Archive

Recipes

Wow has it really only been 6 days? Good news is that means there are 24 days worth of Paleo food left which equals a total of 72 meals. (Aren’t you impressed with my math skills? ) That is 72 more opportunities for you to be inspired to give paleo real food a try. Sure there might be a few odd things that end up on my plate that may seem out of the norm to people ( like sauerkraut ) but all in all, its just food. Before I get onto the real food I will start with where I was standing only a few hours ago:

Any Vegan/vegetarian who says they don't secretly want bacon is full of crap, and any Paleo peeps who say they don't wish they could eat bread are also full of crap.

Now that you got a good look at the gluten bombs lets take a look at the paleo foods of the day…

Breakfast

Eggs sunny side up, bacon, and fruit ( mango and orange )

I realize that eggs everyday might get old to people but I can’t help it…I love them. What are some breakfast foods that you eat now that you would like to see made paleo? Pancakes? Waffles?…. or do you just love eggs as much as I do? Because I am totally okay with that. 😉

Lunch

Just a lil somthing quick and easy.

Dinner

Chicken breast ( pre-cooked free-range organic ) brussel sprouts with a little bit of bacon, sweet potatoes and sauerkraut.

Oh Sauerkraut…you are probably used to only seeing it on top of a bratwurst. Truth is it goes good with just about anything and it is really good for your digestive health. I would write more about it but why would I do that when I can just link you to someone else that already did. Just in case you are too lazy to click on that link- in short, sauerkraut is good for your gut health because it is a fermented food that contains lots of beneficial bacteria. Think Activia…minus all the chemicals, sweeteners, and Jamie Lee Curtis.

Go get some Kraut!

Happy Easter and happy day #4 of Paleo eats!

Breakfast

Eggs over-easy, with sauteed sweet potato, bacon, and fruit ( mango and orange)

I usually like my eggs like my brain feels in the morning…scrambled. But today, I woke up after the sun and decided to add a little excitement to my breakfast and cook my eggs over-easy and accompanied it with some sweet potato, fruit, and of course… bacon. 🙂

Lunch

Cabbage salad with sauteed chicken

For lunch… I was feeling a little lazy so I just used the rest of the cabbage ( seriously one head of cabbage goes a long way ), sliced up some onion, carrots, and red bell pepper, threw it in a pan and cooked it the same way I cooked the cabbage for yesterdays dinner. I tossed some lettuce in some balsamic vinegar and topped it with a sauteed chicken thigh.

I have to mention: If you don’t have a cast iron skillet I recommend you get one. It is great for getting a good sear on your meats. The flavor you get out of a cast iron skillet resembles that of something that has been grilled. Awesome right? The best part is that cast iron skillets are cheap and they last forever. Go get one. Seriously.

Dinner

Roasted duck with pomegranate sauce, roasted fingerling potatoes ( in duck fat of course ), and sauteed zucchini with basil and garlic.

Just in case your not into breasts...same dish, different part of the bird. 🙂

Duck was my protein of choice for Easter dinner. I wanted to do something new… something besides the usual ham. Which- I still don’t get why Christians eat ham on Easter…what if Jesus came to dinner? Seeing that he was a Jew and doesn’t eat pork, he would be quite disappointed…death and resurrection can really work up an appetite.

Thats all for day #4!

Hope you all had a good Easter!

Cooking with someone else in the kitchen is not something I am used to, but the other day I had the pleasure of sharing the kitchen with a crazy skydiver and fellow culinary student. Meet Michael:

I have to admit that I am a pretty big control freak when it comes to sharing a kitchen with someone, but since he passed his fundamentals class practical final, and is nearly as big of a food nerd as me, I gladly welcomed him into the kitchen.

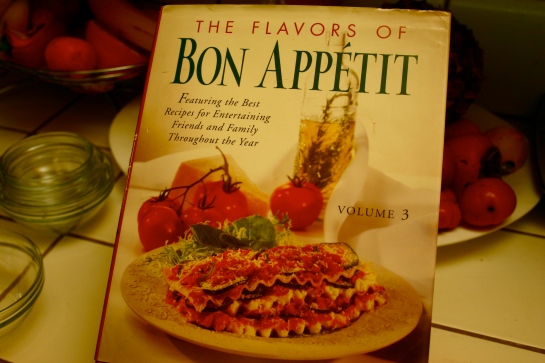
We started off our day with a drive to the dollar bookstore to browse the cookbook section and pick out a random recipe that sounded somewhat appealing. After spending a long enough time sorting through old diet books we finally stumbled upon this hidden treasure…

Inside this fashionable 80’s style Bon Appetit cookbook was this little gem of a recipe:

Macadamia Nut Crusted Sea Bass with Thai Red Curry Sauce

Fish in a Thai red curry sauce? Yes please. We headed over to the market for a few ingredients and got started in the kitchen.

Michael got started on cutting up some zucchini that would end up being encrusted in cornmeal (organic of course )  and pan fried in some coconut oil while I got started on the red curry sauce.

I really enjoyed the sauce in this recipe. It packed a lot of flavor, but it was mild in the curry department. If you are used to Indian curry’s you might find this sauce a little weak, but resist the urge to add more curry and just enjoy as is. Taste the coconut, and the curry paste–love the flavors, and accept the differences.

Here is the Recipe

Thai Red Curry Sauce

1 Tbs. Coconut oil

1 large onion, chopped

1 Tbs. Thai Red Curry paste

2 Cups chicken stock

1 can unsweetened coconut milk

2 Tbs. fish sauce

1 garlic clove, minced

2 Tbs. of water

1 Tbs. cornstarch

10 large fresh basil leaves

Heat the oil in a heacy medium saucepan over medium-low heat. Add onion and saute until translucent, about 5 minutes. Add curry paste and stir 1 minute. Add stock and coconut milk. Simmer 5 minutes and stir in the lime juice, fish sauce, and garlic. Simmer until reduced almost half. ( about 20 minutes ). Mix together the water and the cornstarch in a separate bowl. Slowly add the mixture to the sauce a little at at time until it has reached your desired thickness. You can puree the sauce in a blender first or serve as is.

Now for the fish.

We couldn’t find Sea Bass so we subbed it with Cod. It worked really well. We did follow the recipe and used regular flour but I would love to revise it and make it paleo/gluten free friendly. You could probably get away with grinding the Macadamia nuts down making them as fine as possible and soaking the fish some milk first or just dipping them in egg to get the nuts to stick to it. I think I will try this soon and see how it works.

Here is the original recipe:

Macadamia-Crusted Sea Bass

1 cup toasted macadamia nuts ( About 4 ounces )

2 cups all purpose flour

1 egg beaten to blend

4- 6 ounce sea bass fillets

Thai Red Curry Sauce

Chopped fresh basil

Finely chop nuts with 1 cup of flour in processor. Transfer the mixture to medium bowl. Place remaining 1 cup flour in another medium bowl. Place beaten egg in shallow bowl. Season fish with salt and pepper. ( Season your breading too.. it always helps ) Lightly coat the fish with plain flour; shake off excess. Dip fish into egg, then into macadamia nut mixture, coating completely and pressing nuts firmly to adhere to fish.

Heat oil in heavy large skillet over medium heat. Add fish and cook until crusty and cooked through, about 5 minutes per side. ( Or less )

And the end result:

We served it over a bed of rice and with the zucchini as the side. Finding old, cheap cookbooks is a new hobby of mine and everything turned out delicious. It will be intriguing to see what we cook up in the kitchen next…Tamales anyone?


Olive Oil…you know, that stuff with Rachel Ray’s face pasted all over it. Extra Virgin Olive Oil, or as you may commonly hear it referred to: EVOO.

It's only called EVOO because they couldn't put a picture of Rach and the words "Extra Virgin" on the same label. Hint: Don't ever Google image search "Rachel Ray".

Up until a few weeks ago, I myself had failed to realize what real olive was, and how much of a difference it makes when you using it with good food. Thanks to Chaffin Family Orchards, I found out what real olive oil was.

Instantly after opening a bottle of this oil I could tell the difference. The smell was so much more pronounced. Fresh, and fruity. The nearly rancid smell you get from the store-bought stuff was completely absent.

Not only does this oil taste better than the stuff you buy at the grocery store, but there is two different kinds. Mid-Season and Late season. So what’s the difference?

Mid-Season: This oil is from olives harvested about 4 to 6 weeks earlier than the late harvest. These olives produce a sharper oil that has a spicy finish and slightly higher polyphenol levels. This oil is great for salad dressings and savory applications.

Late-Season: Harvested from olives that are fully ripe. They produce very soft mild buttery flavors. It’s more mild flavor allows you to use it in dishes where you don’t really want to taste the oil. ( mayonnaise for example ).

I am starting to sound like a commercial. But I promise I am not getting paid to advertise, this oil was really just that impressive.

Before I go any further. People, please do not use olive oil for frying. It is a more delicate oil which means it burns at high heat. I know you see Rachel and Emeril doing it all the time but guess what? They are trying to sell their product and don’t really care if you burn it. Olive oil has a smoke point between the ranges of 350-420 degrees F. When you burn oil it releases toxins that can cause cancer. No one wants cancer in a pan.

In reality, olive oil is best used with low heat and salad dressings. I love the fruity notes that extra virgin olive oil gives to salad dressings. Here are a few recipes that are great for using extra virgin olive oil.

Mid-Season:

Cranberry Walnut Apple Salad

Ingredients

For The Salad:

3 Cups of spinach or spring salad mix

1 cup of toasted walnuts, chopped

1 cup of dried cranberries

3 apples, julienned

 For the Dressing:

¼ cup of  extra virgin olive oil or mandarin infused olive oil

2 Tbs. balsamic vinegar

salt and pepper to taste

 Procedure:

To toast the walnuts Preheat oven to 350 degrees. Arrange walnuts on a cookie sheet in a single layer. Bake 8 to 10 minutes or toast them in a skillet over medium-high heat for a few minutes until fragrant. Combine all of the ingredients for the salad. In a small bowl whisk together the ingredients to the dressing until well combined and add to the salad.

Late Season:

Homemade Mayonnaise

Oh Mayonnaise. You either love it, or hate it. I know, those dieticians have been telling you to sub it for mustard the past 10 years but the truth is if you just make it yourself, it has only a few ingredients and is full of good healthy fats.

Ingredients:

2 egg yolks

16 ounces of EVOO

1 Tbs. Apple Cider vinegar

1 tsp dry mustard

1 Tbs. Lemon juice or to taste

Salt to taste

Procedure:

You can either whip up mayonnaise the old fashion way with some will power and a whisk ( like we had to do in culinary school ) or you can use a food processor. I have done my fair share of whisking so I went for the easier route this time.

Place egg yolks, dry mustard, lemon juice and apple cider vinegar in the food processor.

Pulse a few times to mix up the ingredients and then slowly add in the oi while pulsing.

Continue adding the oil and pulsing until the emulsion forms and looks like this:

Now it is starting to look like Mayo. Give it a taste and adjust seasoning to your liking. Add more lemon juice or salt until you are satisfied with how it tastes.

You can store mayonnaise in a jar or airtight container in the refrigerator. Make sure to label and date it!

If you are scared of consuming raw eggs…there is a way you can pasteurize them at home.

To pasteurize your eggs:  place them in a saucepan filled with water and fitted with a digital thermometer. Turn on the heat and bring the water up to 140F.
Keep the water temperature at 140F for 3 minutes (and no more than 142F), reducing the heat on the burner if necessary. Remove eggs from hot water and rinse thoroughly with cold water.
Store in the refrigerator until needed or use right away.
Jumbo sized eggs need to 5 minutes in 140F water.

Enjoy your chemical free mayo!

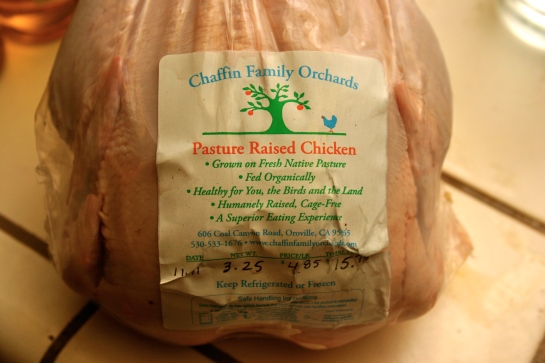
Tomorrow is the big turkey day, only this year, I have decided that instead of getting a turkey from God-knows-where, that I would get a local, fresh, pasture raised chicken from Chaffin Family Orchards. I know that chicken doesn’t seem so exciting and kind of un-American for Thanksgiving, but this isn’t just any chicken. This chicken is about as fresh as it gets and beats any over-sized frozen turkey raised in a cage that was killed 6 months ago.

Fresh Chicken

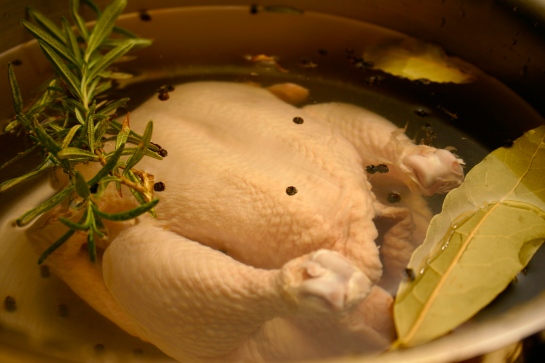
I bought two of these little guys. One for Thanksgiving day, and one for lunch. Although these chickens are so fresh and probably don’t need it, I did a quick 1 hour brine. I always brine my chicken, it is a great way to infuse more flavor and keep it moist. Brining your turkey for Thanksgiving is a must, unless you like your turkey dry. If you did buy a Turkey this year and you are not planning on brining it, I recommend you put that sucker in a brine right now. Seriously, right now. Do it.

Brine Your Bird!

So, what is a brine? You might ask, and what does it do? Well, I suggest you read this article, if you want the dirty details but long story short– It helps your bird absorb water, therefore it looses less moisture when you cook it. And, you can get clever with the brine and flavor it with whatever your heart desires.

For your brine you want  1/4 cup of salt for every quart of water

You can flavor your brine with bay leaves, fresh herbs like rosemary, thyme, garlic, peppercorns…the options are endless. ( Kind of, don’t go crazy )

Just fill a pot up with water, throw in your herbs of choice, bring to a boil, add the salt, turn off the heat and let steep for about 30 minutes. Then, cool down your liquid with ice and add your turkey/chicken and put it in the fridge for 24 hours. Easy, and so worth the end result.

Nice herb bath for your bird

Is your bird enjoying a nice herb bath right now? It’s the least you can do after all its been through. Give it a full package spa treatment. After it is done brining give it a little compound butter massage.

Compound Butter

Compound butter is simply butter with herbs mixed into it. Chop up some herbs, add it to room temperature butter and cover your bird with it. Make sure to put some butter under the breast skin.

Notice the butter under the skin

Season with salt and pepper and your bird is ready for the oven! No more dry Turkey on Thanksgiving!

Between watching the twitter feed from the WAPF Conference in Dallas, (#wapfconf ) wishing I was there, and doing homework for class, I managed to put together a video recipe for some delicious butternut squash soup. Normally, I sigh when I see someone look at a butternut squash and only imagine it in their soup bowl. Butternut squash soup is a dish that has been done a million times with all sorts of variations. There is so much more you can do with this mighty winter squash…but I will admit, I will always enjoy it as soup, no matter how many times I have eaten it. Especially when it starts off a Thanksgiving dinner.

Ingredients:

2 Tbs. Coconut Oil

1 cup of Leeks  ( Pale green and white parts only, sliced thin )

2 cloves of Garlic, minced

3 cups of roasted butternut squash ( directions on how to roast it are below )

1 cup of Gala apples, diced

1 tsp. Curry Powder

1 pinch of Nutmeg

3 cups of chicken or vegetable stock

1/2 cup of coconut milk

Chives for Garnish

Salt and Pepper to taste

Procedure:

Preheat the oven to 375 degrees F.

Cut the butternut squash in half, de-seed and place face down on a sheet pan with a bit of bit of water.

Place in the oven for about 30 minutes or until fork tender. Turn over and lightly oil the squash with some coconut oil and sprinkle with salt and pepper. Place back in the oven for another 10 minutes or until squash starts to caramelize.

For the Soup:

Melt the coconut oil over moderate heat

Add leeks; cook until slightly softened, about 5 minutes.

Add garlic; cook 30 seconds.

Turn up heat to high.

Add apples; cook, stirring, until the apples begin to soften

Stir in curry powder and nutmeg; cook 1 minute. Add the Squash.

Add stock

Purée the soup wih a regular blender or immersion blender.

Bring the soup back to a simmer; add coconut milk and correct seasoning (salt and pepper).

Place in a bowl with a dab of coconut milk and garnish with chives.

Here is the video if you are more of a visual person:

If you have ever prepared Thanksgiving dinner, then you might be guilty of buying canned cranberry sauce at one point. Have you ever looked to see what is really in that stuff? Lets take a look…

For canned cranberry sauce we have cranberries, High Fructose Corn Syrup, Corn Syrup, water, and Corn Syrup….would you like some cranberries with your Corn Syrup? Yes please.

So now that you know what is in one of these canned cranberry concoctions you want to make your own cranberry sauce right? Well you should, and guess what…it takes almost the same amount of time as it does to open one of these cans…with a spoon.

Okay, it takes a bit more time but trust me, it’s worth it. Here is the recipe:

8 oz. (about 3 cups ) cranberries
6 oz. pitted dates ( about 3/4 cup after being processed in a processor )
2 tablespoons of Orange juice
1/2 cup of water
Pinch of Cinnamon

And here is how you prepare it:

You might be thinking that the dates in this recipe is a little weird. Usually cranberry sauce calls for regular old sugar but if I can avoid refined sugars then I will do so. I will also be keeping things gluten free. Stay tuned for some more thanksgiving recipes that will be coming up. What are some of your favorite thanksgiving dishes?